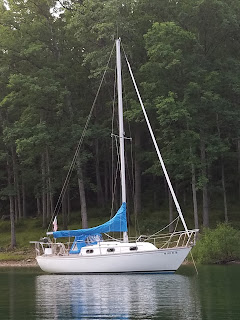
refit of cape dory 25d
Tuesday, February 1, 2022
New stove and misc. stuff
I installed a new ( new old stock from ebay) princess gimbled propane stove on Antares. I built a propane locker for the back of the boat so the tank could be stored outside. it has an overboard vent in the bottom, and a 12 volt s.s. solonoid shut off valve and a hand valve before the line enters the back of the boat. The valve is normally closed and there is a button next to the stove to open the valve so the valve is only on when the stove is in use. The stove also has a auto shut off if it doesn't detect a flame. Can't be too carefull when dealing with propane. I also installed a new battery monitor and a 100 watt solar panell and a iceco cooler / freezer. The 100 watts seem to keep up with the new 12 volt cooler. I also put a Garmin 9" chart plotter, GPS, depth sounder in. I also put a cabin top winch , rope clutch and turning blocks on so I don't have to go to the mast to raise the Main or to reef it. I also built other things like a new dodger and cabin doors and galley table and refinished my exterior wood.
 |
| new gimbled propane stove |
 |
| new iceco cooler and chartplotter |
 |
| new engine cutting board cover |
 |
| new shelf in head |
 |
| new battery monitor and solar panel monitor |
 |
| New Garmin 9" chart plotter GPS depth with 100 watt solar panel in background, inside for the winter |
 |
| new cabin doors |
 |
| new cabin top winch and rope clutch |
 |
| table foled |
 |
| table up |
 |
| table unfoled |
Fuel tank with access hole
install new stripe
To install a new boat stripe you have to first remove the old one. They sell these neet rubber removal tools for your drill. it will take the stripe off. I bought a new roll of 1/2" black stripe material ( ebay) 1/2" x 50' roll. Put little pencil lines where you want the new one to go and carefully apply the new one. I also cut a pointed end and a round dot... also the letters CD.... the stripe is self sticking ....like tape...
You may also noticed I removed the old bottom paint and sanded the gel coat before applying 3 coats of an epoxy barrier coat to prevent water intrusion into the bottom fiberglass which will cause blisters. I later applied bottom paint over the epoxy barrier coat.
 |
| new stripe installed |
 |
| stripe removed |
 |
| removing stripe |
Rebuild old through hull valves
While the engine was out it was a good time to remove and rebuild all of my through hull valves. The backing plates on the old valves was just 3/4" plywood so I decided to use G10 3/4" fiberglass for the new ones. This way water can't hurt them. I used lapping compound to lap all the tapered cone spartan valves. I ordered the lapping compound from spartan marine. One valve had to be replaced. It was left over winter with water in it and it froze so the tapered cone expanded and ever since I bought the boat it had a slight drip. I made a new cone on the lathe but eventually decided to replace it with a new 1 1/2" Groco valve. After making the backing plates and epoxying them to the hull, I installed the valves with 3M 5200 sealant and new 1/4" S.S. bolts. I also replaced all rubber hoses.
 |
| new split coupling |
 |
| empty engine compartment |
 |
| new groco and rebuilt spartan valves |
 |
| reinstalled through hull valves |
 |
| 3M 5200 on through hull fitting |
 |
| putting 3M 5200 on base of valve |
 |
| grounding plate ready to install |
 |
| valve backing plates installed |
 |
| valves and backing plates |
 |
| old and rebuilt valves |
 |
| head through hull removes |
 |
| I made through hull removal tools |
 |
| removing a through hull fitting... |
 |
| engine cooling valve |
 |
| before polishing and lapping |
 |
| removing bolts on valve |
 |
| removal tool.. |
 |
| valve before removal |
New Propeller Shaft
I have a small machine shop at home so I decided to make a new propeller shaft. I had a pc. of 1" s.s. shafting so that's what I made it out of. The hardest part is to get the taper for the propeller to the exact right angle... so I made a dummy out of aluminum first before I cut the stainless steel one. It came out really nice. I also put a new split coupling on it and repacked my shaft seal and put a new shaft seal rubber on. I also replaced my cutless bearing...
 |
| new shaft and prop. |
 |
| new shaft and cutless installed |
 |
| new shaft packing rubber seal |
 |
| making the new shaft |
 |
| replacing the shaft packing |
 |
| removing the old cutless bearing |
th
 |
| old shaft and packing gland |


